
Chewy & Buttery Recipe
There’s something magical about biting into a cookie that’s perfectly balanced—chewy on the inside with just the right amount of crisp on the edges. This recipe has been a favorite since 2012, and for good reason. It’s simple, versatile, and delivers a texture that feels like a warm hug.
With just nine key ingredients, this recipe is a testament to the beauty of minimalism. The combination of granulated sugar and brown sugar creates a delightful crunch, while the extra peanut butter ensures a rich, melt-in-your-mouth experience. It’s like tasting the inside of a peanut butter cup, but better.
What makes this recipe truly special is its adaptability. Whether you’re making classic peanut butter blossoms or experimenting with cookie cups, the possibilities are endless. It’s a timeless treat that continues to win hearts, one batch at a time.
Key Takeaways
- This recipe uses only nine simple ingredients for a quick and easy treat.
- The cookies are known for their chewy centers and crisp edges.
- Granulated sugar adds a slight crunch to the texture.
- The recipe has been a favorite since 2012 and remains popular today.
- It’s versatile and can be adapted into various cookie variations.
Overview & Benefits of Soft Peanut Butter Cookies
Few treats can match the comforting warmth of a perfectly baked cookie. These soft, buttery delights are more than just a snack—they’re an experience. With their rich flavor and unique texture, they’ve become a staple in many households.
Why You’ll Love These Cookies
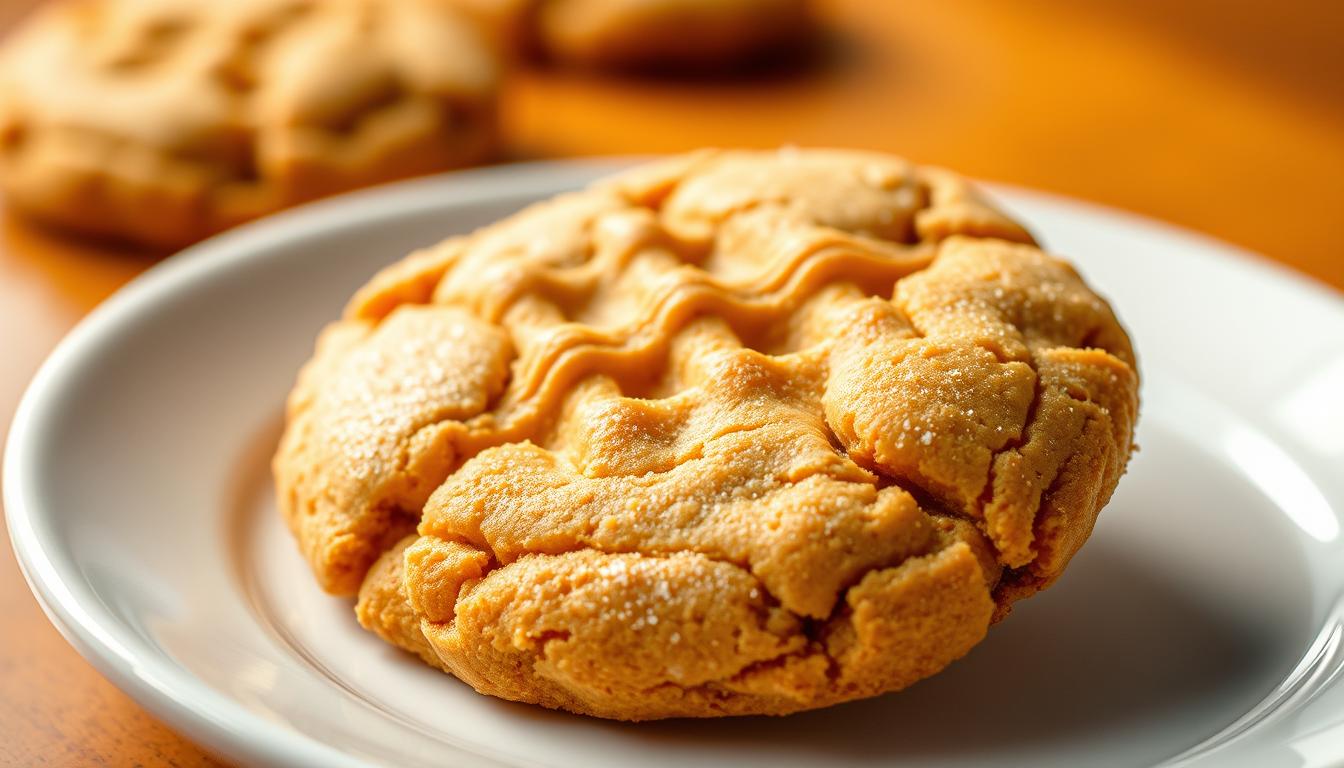
What makes these cookies stand out is their intense peanut butter flavor. Each bite is packed with a creamy, nutty taste that’s hard to resist. The chewy center and slight crunch from the sugar coating create a perfect balance of textures.
Here’s why they’re a favorite:
- They’re made with minimal flour, ensuring a tender, melt-in-your-mouth feel.
- The combination of brown and granulated sugar adds a light crunch and sparkling exterior.
- They’re versatile, allowing you to experiment with add-ins like chocolate chips or nuts.
The Unique Texture and Flavor Profile
The secret to these cookies lies in their dough consistency. Chilling the dough before baking ensures they hold their shape while baking. This step is crucial for achieving that professional, bakery-style texture.
Using both brown and granulated sugar not only enhances the flavor but also gives the cookies their signature crunch. The creamy peanut butter adds richness, making each bite unforgettable.
Whether you’re a seasoned baker or a beginner, this recipe is designed to deliver consistent results every time. It’s no wonder it’s been a beloved treat since 2012.
Key Ingredients and Their Roles
Understanding the role of each ingredient is key to baking success. This recipe relies on a few simple components to create a treat that’s both flavorful and textured. Let’s break down the essentials and their contributions.

The Importance of Peanut Butter
Peanut butter is the star of this recipe. It acts as a binder, reducing the need for excess flour while adding a rich, nutty flavor. Using a high-quality, creamy variety ensures a smooth dough and a melt-in-your-mouth texture.
This ingredient also provides moisture, keeping the cookies soft and chewy. Its natural oils contribute to the overall richness, making each bite unforgettable.
Sugar, Flour, and the Role of Butter
Sugar plays a dual role in this recipe. Brown sugar adds moisture and a hint of caramel flavor, while granulated sugar creates a slight crunch on the edges. Together, they balance sweetness and texture.
Flour is used sparingly to maintain a tender crumb. Too much flour can make the cookies dense, so this recipe calls for just enough to hold the dough together.
Butter adds richness and helps create a tender crumb. Using unsalted butter allows you to control the saltiness, ensuring the flavors are perfectly balanced.
| Ingredient | Role |
|---|---|
| Peanut Butter | Binder, flavor, moisture |
| Sugar | Sweetness, texture, crunch |
| Flour | Structure, tender crumb |
| Butter | Richness, tender texture |
| Baking Soda | Leavening, rise |
| Salt | Flavor enhancement |
| Egg | Binding, moisture |
Each ingredient works in harmony to create the perfect cookie. From the creamy peanut butter to the balanced sugars, every component has a purpose. Mastering these basics will elevate your baking game.
Step-by-Step Preparation Instructions
Creating the perfect cookie starts with mastering the dough. Follow these steps to ensure your cookies turn out just right every time. Each stage, from mixing to baking, plays a crucial role in achieving that ideal texture and flavor.

Mixing and Chilling the Dough
Begin by creaming the butter and sugar until the mixture is light and fluffy. This step is essential for creating a smooth base. Next, add the egg and peanut butter, mixing until fully combined.
Gradually blend in the dry ingredients to form a soft, creamy dough. The consistency should resemble frosting. Once mixed, chill the dough for at least 1-2 hours. This step firms up the dough, making it easier to handle.
Rolling, Coating, and Fork Indenting
After chilling, scoop the dough into uniform balls. Roll each ball in sugar to create a sparkling exterior. Place them on a baking sheet, leaving enough space for spreading.
Use a fork to press a criss-cross pattern into each ball. This not only adds a classic look but also ensures even baking. Bake until the edges are golden but the centers remain soft. Let them cool slightly before enjoying.
- Cream butter and sugar for a smooth base.
- Chill the dough to firm it up for easier handling.
- Roll dough balls in sugar for a crunchy exterior.
- Use a fork to create the signature criss-cross pattern.
Baking Tips for Perfect Texture
Achieving the perfect cookie texture requires attention to detail and the right techniques. From shaping the dough to managing oven temperature, every step plays a crucial role in creating a treat that’s soft inside with a slight crunch on the edges.
Using the Criss-Cross Technique
The criss-cross technique is more than just a decorative touch. Pressing a fork into the dough helps control the spread of the cookie, ensuring an even bake. This method also creates a slightly crisp exterior while keeping the center soft and chewy.
For best results, chill the dough before shaping it into balls. This step prevents excessive spreading and helps maintain the cookie’s structure. Roll each ball in sugar for a sparkling finish, then use a fork to create the classic pattern.
Ideal Oven Temperature and Baking Time
Preheat your oven to 350°F for consistent results. This temperature ensures the edges set nicely while the center remains tender. Bake the cookies for 10-12 minutes, watching closely to avoid over-baking.
If the cookies spread too much, try reducing the dough ball size or chilling the dough longer. Using quality baking sheets and parchment paper also promotes even baking and prevents sticking.
By mastering these techniques, you’ll create cookies with the perfect balance of texture and flavor. Whether you’re a beginner or an experienced baker, these tips will elevate your recipe to the next level.
Variations & Creative Twists
Transform your classic recipe into something extraordinary with creative twists and variations. Whether you’re adding new flavors or swapping ingredients, these ideas will take your baking to the next level.
Experimenting with Add-Ins and Substitutions
One of the easiest ways to customize your cookies is by incorporating add-ins. Chocolate chips are a popular choice, adding a sweet contrast to the nutty flavor. For a crunchier texture, try mixing in chopped nuts like almonds or walnuts.
If you’re looking for a substitute, consider using almond butter or cashew butter. These alternatives bring a unique flavor profile while maintaining the rich, creamy texture. Just remember to adjust the recipe slightly to account for differences in consistency.
Adjusting for Natural vs. Processed Peanut Butter
Using natural or processed peanut butter can impact your cookies. Natural varieties often separate, so you’ll need to stir them thoroughly before use. Processed options, on the other hand, are more stable and easier to work with.
Here’s a quick comparison to help you decide:
| Type | Texture | Flavor |
|---|---|---|
| Natural Peanut Butter | Thinner, may require chilling | Nutty, less sweet |
| Processed Peanut Butter | Thicker, easier to handle | Sweet, consistent |
For best results, stick to the type of peanut butter your recipe calls for. If you’re experimenting, be prepared to tweak the dough’s consistency by adding a bit more flour or chilling it longer.
With these tips, you can confidently explore new flavors and techniques while keeping the signature peanut butter flavor intact. Whether you’re making cookie cups or thumbprint variations, the possibilities are endless.
Troubleshooting and Success Tips
Mastering the art of baking involves knowing how to troubleshoot common issues. Even with a tried-and-true recipe, challenges like sticky dough or uneven baking can arise. Here’s how to tackle these problems and ensure your cookies turn out perfectly every time.
Overcoming Dough Consistency Challenges
If your dough feels too soft or sticky, don’t panic. Chilling it in the fridge for an extra 30 minutes can make a world of difference. This step firms up the dough, making it easier to roll into uniform balls.
For a more manageable texture, you can also add a tablespoon of flour. Be cautious not to overdo it, as too much flour can make the cookies dense. Remember, patience is key when working with dough.
Storing, Freezing, and Reheating for Freshness
To keep your cookies fresh, store them in an airtight container at room temperature. They’ll stay soft and delicious for up to a week. For longer storage, freezing is your best option.
Shape the dough into balls and place them on a baking sheet. Freeze until solid, then transfer to a freezer-safe bag. When you’re ready to bake, simply place the frozen dough balls on a baking sheet and bake as usual—no need to thaw.
“Freezing dough is a game-changer. It lets you enjoy fresh-baked cookies anytime.”
Here’s a quick guide to storing and reheating your cookies:
| Method | Duration | Tips |
|---|---|---|
| Room Temperature | Up to 1 week | Use an airtight container to maintain freshness. |
| Freezing Dough | Up to 3 months | Freeze dough balls for easy baking later. |
| Reheating | 5-10 minutes | Warm in the oven at 300°F to restore softness. |
By following these tips, you’ll overcome common baking challenges and enjoy perfectly baked cookies every time. Whether you’re adjusting dough consistency or storing for later, these strategies ensure success.
Conclusion
Crafting the perfect treat is all about balance and precision. This recipe combines minimal flour, creamy peanut butter, and balanced sugars to create a texture that’s both chewy and crisp. The result is a timeless favorite that’s easy to make and endlessly versatile.
From mixing the dough to baking to perfection, each step is designed to deliver consistent results. Whether you stick to the classic version or experiment with add-ins, this butter cookie recipe adapts to your creativity.
Remember to store your treats properly to maintain their freshness. Enjoy them warm from the oven or save them for later—either way, they’re sure to delight. With the right techniques, you can master this recipe and enjoy a delicious treat anytime.