
Best brownie Gooey
Remember that childhood feeling of sneaking dessert before breakfast? Imagine capturing that joy in a pan – warm, fragrant, and waiting to transform your mornings. Picture pulling something from the oven that crackles under gentle pressure, releasing whispers of melted chocolate into the air.
This isn’t just about satisfying a sweet tooth. It’s about creating edible memories with crispy edges that shatter like autumn leaves, giving way to centers so tender they nearly melt on your tongue. The magic lies in balancing textures: that satisfying crunch followed by velvety richness that makes you close your eyes in appreciation.
You’ll need no fancy equipment or rare ingredients. With common pantry staples and one bold afternoon, you can master a recipe that bridges breakfast simplicity and dessert sophistication. These squares adapt effortlessly – pair them with coffee for morning fuel or dress them up with berries for evening gatherings.
What makes these treats special isn’t just their versatility. It’s how they evoke nostalgia while surprising your palate with depth. Each bite delivers familiar comfort layered with grown-up complexity, proving that sometimes the simplest pleasures leave the strongest impressions.
Introduction to the Ultimate Brownie Experience
The secret to a versatile chocolate delight lies in balancing pantry staples with culinary ingenuity. Michelle Lopez’s approach reimagines classic techniques, creating squares that feel indulgent yet approachable for any time of day.
What Makes These Treats Special?
Unlike traditional recipes, this version combines powdered and granulated sugars. The duo mimics boxed-mix textures while avoiding artificial additives. Cornstarch in powdered sugar thickens the batter naturally, yielding fudgy centers with crackly tops.
- Oil replaces butter for moisture retention
- Eggs whisked with water create airy structure
- Dutch-process cocoa deepens chocolate intensity
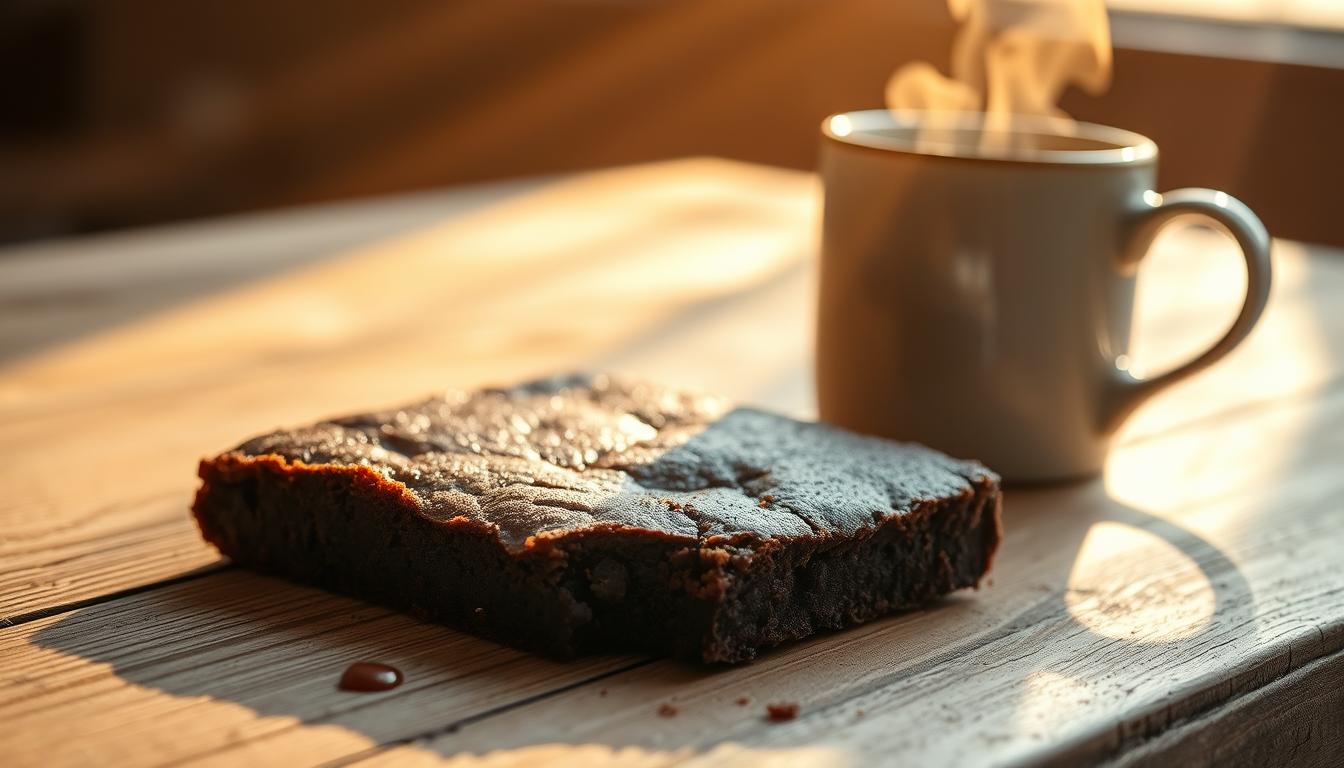
Morning Fuel or Evening Star?
These squares walk the line between breakfast-friendly and dessert-worthy. Reduced sweetness lets chocolate’s natural bitterness shine, pairing perfectly with coffee. Yet their rich texture satisfies post-dinner cravings when served warm with berries.
The recipe’s adaptability comes from smart ingredient ratios. You get crispy edges for contrast and tender interiors that melt slowly. This balance makes them equally suited for grab-and-go mornings or plated desserts with vanilla ice cream.
Essential Ingredients and Equipment
Creating memorable chocolate squares begins with precision in your pantry selections and tool choices. Every component plays a critical role in achieving that signature balance of crisp edges and velvety centers.

Key Pantry Items and Measurement Tips
Start with 1½ cups granulated sugar and ½ cup powdered sugar—the duo that builds structure while locking in moisture. Combine with ¾ cup all-purpose flour and ⅔ cup Dutch-process cocoa powder for the base. Sift these dry ingredients to prevent clumps and ensure smooth blending.
High-quality dark chocolate chips (Ghirardelli 60% recommended) melt evenly, creating pockets of rich texture. Choose oil carefully: canola keeps flavors neutral, while olive adds depth. Whisk together 2 large eggs, oil, water, and vanilla extract for a silky batter that rises perfectly.
Necessary Tools for Easy Cleanup
An 8×8-inch pan is non-negotiable—it ensures even heat distribution. Line it with parchment paper and a light cooking spray for hassle-free removal. Use nested measuring cups and a sturdy rubber spatula to mix ingredients thoroughly without waste.
Two mixing bowls simplify the process: one for dry ingredients like flour and cocoa powder, another for wet components including eggs, oil, and vanilla. This setup minimizes mess and maximizes efficiency, letting you focus on perfecting each batch.
The Step-by-Step Recipe Process
The journey from bowl to oven transforms humble ingredients into decadent squares through methodical precision. Two critical phases separate success from disappointment: batter preparation and heat management. Let’s break down each stage for foolproof execution.

Mixing Techniques for a Fudgy Batter
Start by whisking eggs with oil, water, and vanilla until silky. In another bowl, combine sugars, flour, cocoa powder, and salt. Gently rain the dry mixture over the wet ingredients using a sieve. Fold with a spatula using J-shaped strokes – 45 turns maximum. The batter should resemble molten lava with visible flour streaks disappearing last.
Mastering Baking Time and Temperature
Preheat your oven to 325°F while preparing the batter. This lower temperature prevents crust formation before the center cooks. Bake for 40 minutes before testing. Insert a toothpick 2 inches from the edge – perfect doneness shows 3-4 sticky crumbs. Let cool 15 minutes before slicing. Residual heat continues cooking the center, locking in moisture.
Remember: Thick batter requires patience when spreading. Use a dampened offset spatula to coax it into corners without deflating air bubbles. These tiny pockets create the signature tender crumb structure that makes each bite memorable.
Best brownie Gooey: Tips for Achieving Fudgy Perfection
Ever pulled a pan from the oven wondering if you nailed that ideal balance between chewy and crisp? Your oven timer holds more power than you think – four minutes can shift results from molten to cake-like. Discover how to harness time and temperature for customized outcomes.
Reading Doneness Signals
Three toothpick clues reveal your texture destiny. For lava-like centers, remove when the tester shows thick batter smears (24 minutes). Want firm-yet-soft squares? Wait until you see light brown stains with minimal residue (28 minutes). Clean picks mean cake-like results (32 minutes).
Customizing Your Ideal Bite
Use this guide to tailor your batch:
| Texture | Bake Time | Toothpick Clue |
|---|---|---|
| Ultra-Gooey | 24 min | Wet batter streaks |
| Classic Fudgy | 28 min | Moist crumbs |
| Structured | 32 min | Few dry crumbs |
Always subtract two minutes if adding extra chocolate chips. The edges crisp naturally from pan contact, while the center firms during cooling. Remember: underbaked treats can be rescued with 5 more minutes; overbaked ones stay dry forever.
Flour lightly and let sugar work its magic. With these timing tricks, you’ll create squares that match any mood – whether you’re craving melty indulgence or something sturdy enough for ice cream toppings.
Creative Variations and Customizations
Transform your baking canvas into a personalized masterpiece with simple tweaks. This flexible foundation welcomes both classic additions and bold experiments, letting you craft treats that match any craving or occasion.
Adding Mix-Ins Like Chocolate Chips and Nuts
Boost texture and flavor with mix-ins that complement rich cocoa notes. Walnuts add earthy crunch, while pecans bring buttery warmth. For chocolate lovers, try layering dark chunks with white chips – their sweetness contrasts beautifully with bitter undertones.
Go beyond nuts with crushed peppermint candies or sea salt-topped caramel bits. Marshmallows create pockets of gooeyness when baked, and cookie crumbles add playful texture. Fold in ingredients gently to maintain that signature fudgy consistency.
Serving Ideas for a Versatile Treat
Temperature plays with perception. Warm squares paired with vanilla ice cream melt into decadent sauce carriers. Room-temperature versions let pure chocolate flavor shine alongside fresh berries.
| Occasion | Pairing | Effect |
|---|---|---|
| Casual Snacking | Cold milk | Balances richness |
| Dinner Parties | Salted caramel drizzle | Elevates presentation |
| Brunch | Espresso shot | Enhances bitterness |
Slice creatively: diamond cuts for elegance, squares for lunchboxes. Edges satisfy crunch-seekers, while center pieces cater to soft-texture fans. Every serving becomes a tailored experience.
Proper Storage and Reheating Techniques
Your masterpiece deserves protection from staleness and flavor loss. With strategic methods, you can preserve that just-baked magic for days – or even months – while maintaining ideal textures.
Safe Storage to Maintain Freshness
Let your creation cool completely for two hours before slicing. This waiting period lets internal steam redistribute, preventing crumbly edges and collapsed centers. Use a bread knife for clean cuts without squishing tender layers.
Store squares in an airtight container at room temperature. Line the base with parchment paper to absorb excess oils. For optimal results:
- Separate layers with wax paper to prevent sticking
- Add a slice of bread to maintain moisture (replace daily)
- Avoid plastic wrap – it traps condensation
Refrigerate for firmer textures that hold up to toppings. Freeze individual portions wrapped in parchment paper, then place in freezer bags. Thaw at room temperature for 30 minutes before serving.
Revive leftovers in the microwave using 15-second bursts. For crispier edges, warm slices in a 300°F oven for 5 minutes. Both methods restore that irresistible fresh-from-the-oven appeal without compromising quality.
Conclusion
You’ve mastered a one-bowl wonder that transforms pantry staples into decadent chocolate squares. This approach proves exceptional results needn’t require complex steps or specialty tools. With standard measuring cups and a reliable baking pan, you’re equipped to create treats that balance crisp edges with tender centers.
The techniques you’ve learned – proper mixing rhythms, temperature control, and timing cues – apply to countless recipes. Store leftovers in airtight containers or freeze portions for later. A quick microwave zap restores that fresh-from-the-oven appeal whenever cravings strike.
Customization remains your greatest advantage. Swap oils for varied flavor depths or fold in nuts for texture contrast. Each batch becomes a new experiment, yet the foundation stays foolproof. That’s the beauty of understanding how fat interacts with unsweetened cocoa and sugar.
Now share these creations confidently. Whether packed in lunchboxes or plated for guests, they’ll spark joy through every fudgy bite. Your kitchen just became the neighborhood’s most requested bakery.